Rookie65
-
Posts
1168 -
Joined
-
Last visited
Content Type
Profiles
Forums
Gallery
Everything posted by Rookie65
-
You do it from one plan. Send to layout what you want/need, save that layout sheet, then create the next.
-
Go into the "deck support" section of the room specification dbx for the deck. When you open it, change the default "deck post footings" to the diameter (width) you need for the helical piles. The thickness will be the depth you need to get below your frost line plus the height above terrain you choose.
-
I have a "master" file that I start my designs from and keep a few different wall types in it so when I am designing a project, I can select the wall type I need instead of creating one for every project. Great for addition jobs to define which are existing and new walls. Helps speed things along and may be something to keep in mind if you find yourself doing more projects.
-
Bill, You may want to go into the default settings under wall types and create a new wall type with that definition. You can then draw any further walls with that definition. If you are changing the default settings, it reads that as the overall wall type you want for all of the walls in that family (exterior,interior, etc.). I hope that makes sense?
-
Try using the "backclipped cross section" drop down in the section option. That will let you limit the depth of the view, which may be what you are looking to do.
-
Might be that you need to set the table "distance above floor" from zero to the thickness of the rug.
-
my guess is it's the sill plate?
-
You can try it from an elevation camera view w/a "tape measure" or "point to point" dimension. Not an option with a 3d view.
-
Hi, First I would update both computers to Windows 10, then install the Home Designer program on the desktop since that will probably have more power and memory to work the program. See what you have for a graphics card so everything will display for you. For the house design, start out with a list of rooms you need. Then list the 3 "Haves" (must, would like to, if I can) of features you desire. I would suggest thinking worse case scenario and design the house for ADA requirements. Wide doors, barrier free bath fixtures, etc. Think about the site and where the views are, the sun rises and sets and access from the road. Try to keep room sizes based around a 16" oc framing to minimize waste of materials. Hope this is a start for you?
-
See if this link will help. https://www.homedesignersoftware.com/support/article/KB-00439/creating-a-cross-section-detail.html?utm_content=&utm_source=VerticalResponse&utm_medium=Email&utm_term=Learn how&utm_campaign=Home Designer Software News
-
I do my schedules in an excel spreadsheet, then copy and paste it into a text box.
-
When selecting the bay window, in the "general" tab, you can lower the ceiling. Maybe give that a try?
-
I think most areas have guidelines as to how much exposed foundation needs to be there. I would never advise siding to go to grade. Should there be any porous material behind it, it could cause a "wicking" situation & pull moisture up behind the siding. Plus there's always chances of damage to it from snow removal equipment, de-icer, etc. Just my 2 cents.
-
Thank you Eric, it worked.
-
I have found that with Pro 2018, rarely does the sf show on the first floor. Seems to be in the basement and 2nd floor fine though.
-
Hi Bob, Maybe try it as a custom countertop?
-
Hi Jeff, I don't have Suite, yet maybe something like adjusting the bottom heights of each appliance will let you stack them? If all 3 have the same or interfering locations, it will probably give you that error.
-
Try Amazon.com Hammermill Paper, Color Copy Digital, 32lb, 19 x 13, 100 Bright, 500 Sheets / 1 Ream, (106128R), Made In The USA 4.2 out of 5 stars 142 customer reviews | 26 answered questions Was: $41.41 Price: $32.60 & FREE Shipping. Details You Save: $8.81 (21%) Size: 500 Sheets
-
Hello, I have attached an example of what I use for projects that don't need to go on 18 x 24 paper. As long as you have the "text" function, you can make a version of this for your own use. I hope it helps? title page example.pdf
-
Maybe try creating the tread in the direction the grain runs w/the material. Once it's set, rotate the item 90 degrees and maybe the grain will stay with it? Justa thought, haven't tried it & working on a project right now. Good luck!
-
Hi, Yes, they have added "L" and "U" shaped stairs to the basic functions. A few new options in the defaults too. It would be great if at some point they would add 2 and 3 wide double hung combinations. Centering the mull all the time gets to be a pain in the rear end. I did do a deck & tried the Azek railing. The result wasn't ideal, so I used the default program deck parts & changed the color to white for all of the items. Seemed to keep the structure easier to build. Haven't done anything with the moldings yet though. Good luck!
-
Very cool. Thank you.
-
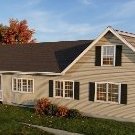
The porch is on the ground level with the roof starting from under the windows. They want an enclosed vestibule where the front door is. If that was done w/a porch too, then I can go from there. Thank you for the help!
-
Jo_Ann, That's very nice, thank you. They also want a screened porch to the left side of the house to fit under the windows. How did you do what you did?