

Timeless_16
-
Posts
71 -
Joined
-
Last visited
Content Type
Profiles
Forums
Gallery
Posts posted by Timeless_16
-
-
2 hours ago, xJonQx said:
Zachary,
I suspect you haven't changed a few key settings. Your graphics card could also be a factor.
First, so we can rule out your graphics card, please download and test the attached test plan I exported which has a camera in it setup for good PBR.
Here you can see there's clearly a difference between Standard and Physically Based:

Here are the settings I suspect you haven't tuned:
Adjust Lights

Use Light Settings - This will ensure that all of your lights will be used as part of the render, as opposed to a subset (up to Maximum Lights) being automatically chosen by the software.

Toggle Sunlight (Off)

Interior lights seem to turn off or are overpowered when the Sun is on.
Edit Active Camera (on your PBR camera)

You definitely want to enable Show Shadows and probably Reflections as well.

Lastly you probably want to modify the Light Data for each of your lights. I modeled mine based on the PAR20 LED lights i'm using. I measured the Cut Off Angle from the real light, got the Lumens from the light packaging, and guesstimated the Drop Off Rate based on what looked like my lights:

...and, it should go without saying, that you need to add lights to your plan for any of this to work.
Don't forget we now have this handy tool to select all of the similar items so you can edit all your lights at once:

Good luck, please let me know if this helps!
-Jon
Test Plan for Example Above:
Jon,
Thanks, I will definitely try it when I get home this evening!
I'll let you know how it goes. I understand the sun thing but that is a bummer that it messes with the render so bad.
-
1 hour ago, Dominic900 said:
Hi Timeless-16,
Here are some images that I could not load when writing to you in messager. the first is PBR and the 2nd is standard view. to show the difference.
Dominic


Here is what I came up with after only a few minutes worth of work.
The second image is the same model - minus the island that I exported to Sketchup and Rendered with Podium.
The third image is of a Kitchen I did entirely in Sketchup when I switched from HD Pro to Sketchup and Podium. The last two of a Bathroom I did awhile back.


The issue with it (the second image that I tried exporting), is Sketchup only imports up to about 8-10 mb file sizes, bigger than that and it crashes. So if I want to improve render quality, I am going to have to figure out how to afford getting X11. Or experiment with some external rendering engines.
-
Okay, thanks!
-
58 minutes ago, solver said:
What you want is not clear.
Maybe post a plan with the island.
When posting images, try using Vector View as things show up better.
I'll post that as soon as I get home from work! Thanks for the tip!
-
No matter what setting, there is virtually no difference in quality? I have seen post on this form that are significantly better! Any ideas? I added the standard rendering, the PBR rendering and a image to show my graphics card, which runs Sketchup and Podium render just fine.


-
 1
1
-
-
I made this Island and I can't get the bottom of the cabinet out. I tried just extending the other side of the cabinet but I needed the back splash for the back back side of the cook top.

-
1 hour ago, solver said:
Have you looked at the new Physically Based Rendering (PBR) available in Pro 2020?
I have but it's nowhere near the quality of the picture I posted above. That was all done in HD Pro and exported to Sketchup.
Unless I'm doing something totally wrong the renders with PBR are on only slightly better than they were with HD Pro 2018. Maybe I'm not doing it right??
-
Hey All,
I just upgraded to HD Pro 2020, I had switched over and was just using Sketchup with the podium render add on to get realistic rendering. While I got use to it, I just wasn't comfortable with it like I was with HD Pro. And seeing since I couldn't afford the $2,400 price with the upgrade discount, I got Sketchup Pro. Still much cheaper.
Just happened to stumble on the 2020 version of HD Pro and seen it exported in Collada (.dae file), it got me excited and I upgraded.
I am able to export the Collada file to Sketchup and render really nicely. See attached image, however when I add the island, it quits importing into sketchup and I get a import failure due to size of the file.
I can't afford Premier and have to stick with HD Pro, so my question is, does anyone export to a standalone rendering engine like Maxwell Renderer? It's nearly $600 but still much cheaper than Premier. And will hold me over until, I can afford Chief Premier.
Any ideas on file size, or how to export differently? Or what rendering engine are you using?

-
Jo Ann,
Is there anyway you could do a step by step (guide of sorts) or is there already one that exist for this particular type setup?
I'm usually pretty good with being able to ask, then replicate, but this has me a little confused on the exact steps!
Thanks, Zac.
-
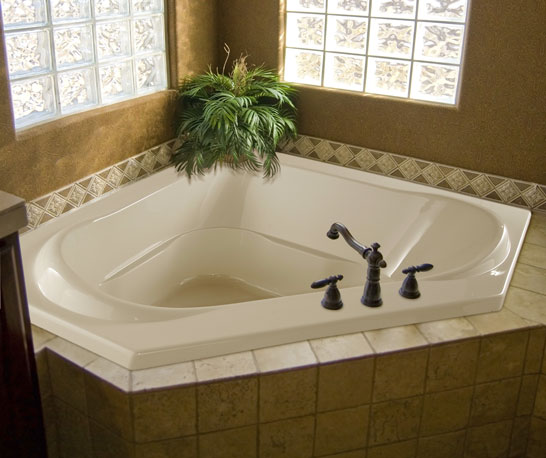
So basically once I have it set, like in the thumb, go in and edit the material of the tub to water? Is that what you are referring to, or something different?

-
Eric,
That is kind of what I figured. I was able to make the exact replica, just with my tub, the issue came when putting the water in the tub or making the water appear...... Is there a way to do that in Home Designer??
EDIT: Or would there be a way to make a corner tub like that, using the design method in the home designer training video shown here - https://www.youtube.com/watch?v=_CTjMijJLpQ
But make it fit into a corner type tub, like this:http://www.whirlpoolbathtubs.com/images/stories/virtuemart/product/clarissa.jpg
-
Hey All,
You guys majorly come through for me every time! And now I am hoping you can help with this!
Here is what I was trying to do:
I did everything to the "T", however, I did differ in my choice of tubs. I put a tub that was shaped more like this - http://www.whirlpoolbathtubs.com/component/virtuemart/atlantis/atlantis-collection/cascade-detail.html?Itemid=0
Which in-turn made I made a square polyline over the tub to open the slab (like what was done in this video - user from the Facebook group was nice enough to do this video for me and I got the principle but seem to be doing something wrong and now I'm frustrated - http://www.screencast.com/t/wXOauj0rg -I tried using the break tool to change the shape so it was the shape of the tub but I can't figure out how to change the poly line.
Thanks, Zac -
adding accessories like switches, outlets, and other objects makes scene look more lived in and realistic.
Marceline, that is amazing the difference. How did you get the counter tops to shine?
Also, sorry for not responding, I have been dealing with serious health issues and have been more focused on trying to stay alive..
I attached some renders from this morning and I think I am getting the hang of it.......... Sorta.....
The only thing now is finding out in the render (lableled Final Render, why did the lamp closest to the window stop working?


-
Hey All,
I did the backup but even compressing it, it said it was too big............
Also, I am not sure how to save camera views.I was however, able to do the screens of the renders.
The backup file even compressed is 26.2MB which is slightly bigger than allowed...


-
Thanks,
Ok, File is compressed and I uploaded it.Any tips help or direction is helpful. If you changed anything, can you explain what you did to it.
Zac~
-
Solver,
It says the file is too big....
If you'll send me an email at the one listed in my signature at the bottom, I can send it to you.
-
Hi Everyone,
I have a question, I know it's probably in one way or another been answered and I remember I asked it at one point and got a few varying answers.What I am wanting to do is improve the renderings and or quality of the render. I am getting better, still not there but getting there. I am doing one room at a time and when I make a mistake, I work to find a solution and figure it out. I am currently working on one personal project and one for a friend of mine.
The reason I am asking is because I did some hunting of sorts and looking at different qualities of rendering for both Chief X8 and HD PRO 17 (the latter of which, is what I am using). I love it, even though in my mind I still stink at it, my girlfriend and friends and family say they look really decent.
So as I was digging I come upon (Home Designer Renderings) that were really incredible. Vastly better than the quality I have seen or have done myself. They almost look raytraced, like what you get out of Chief X8, however I can't afford the Pro Version and I am stuck with HD, I did some digging and found the renderings I found were done by external light rendering programs or what I think is the case. But have not found a definite answer or someone that will prove that it's done in HD with exported cleaned up renderings.
What I am curious of, has anyone figured out a way to improve the lighting and photorealistic aspect of the renderings in the Home Designer line?
I am really struggling for some reason figuring out the controls - I read the manual and I know I am probably missing it somewhere but for example, I wanted to change it to night and light the kitchen up but I can't seem to figure out how.I know for some that might be a stupid question or a want with a program that wasn't designed with the quality renders like in X8 but I have seem some of the renders better than mine. I know that David and a few others told me to just play with adjustments but I am a little lost.
Does anyone have tips for render quality? Can I export render to a freeware type rendering program? Best way to pre-set the lighting?
Thank You All So Much, Zac.
EDIT: When I get home tonight - I will attach a file that I am working on - I just happened to find a kitchen in one of the downloadable examples of the site and converted some of the features over just as a quick test of a few things, but when I do a render, it does not look near as good as the rest I have seen.
-
I started making a floor plan but had to change it when I decided to switch to an open center portion and closed side design with a upper loft / work space.
-
 1
1
-
-
Hi All,
I have been using HD PRO 17 for quite a while and I have been trying different designs and doing basic remodel (specific rooms for friends, etc).
But I am wanting something just for myself. I am wanting to start a project as a surprise for my soon to be wife. I have always wanted a barn home and have dreamed about it for quite sometime. I know HDP17 can pretty much do just about anything as long as you can more or less dream it but I was wondering if A) it's possible to design something like below and B if anyone has ever designed anything similar, do you have any tips?Here is what I am wanting design wise.
Thank you, Zac
-
Hi All,
I have searched high and low for a printed manual and or a printed book I can purchase to fill in the gaps of what I don't know software wise. At the moment, I don't have a printer at home and going by what they charge to print, it would literally cost nearly $200 to have the reference manual that comes with the software via PDF form printed.
I have found a few books - see attachment, like this but it is for CA Professional X8. And since I don't know all the differences, I don't want to purchase something that has all different buttons, etc. The book is $75, which I can get no problem, it's just the idea of paying $200 to have something printed.
I have used the tutorials that CA offers but I was wanting a manual as well. Any ideas? Thoughts on that book being used for the Home Designer Pro version?
Thank you!
-
Am I missing something? Is there a way to add the rails and springs for the garage door and opener?
-
Thanks David, that worked!
-
Hi All,
I thought I had it set up for so that the roof would move if I moved the wall at least it has been before. Apparently, it's not set to correct dimensions when exterior wall is expanded.Is there a quick fix for this?
Below I attached the view that shows the gap in the roofing.

-
I honestly have never thought of it. Until last night, I got everything up and running and after messing with the test model (getting use to the program again), I started up the first model which is going to be the actual "build" of sorts for my own home.
It occurred to me during adding windows and other features that I wanted to drop the background because the background was messing with my perception when it come to zooming in and out. I don't know why but it was getting annoying. So every time I would switch, I'd have to go back - that's when it occurred to me to think where is the toggle option.
I will put that in the feature request.


Physics Based Rendering? What am I doing wrong?
in Q&A
Posted
Jon,
I uploaded the test file, it looks like both images (looks like there were two) and both looked the same **both look like the standard view**, I am going to tweak the settings you gave me into my render and see what happens.
**UPDATE**
SUCCESS!!!! FINALLY, while it may not be as good as Chief Premier and whatever else some guys are throwing at it, it isn't too shabby and honestly, with texture tweaks, I think it could be close to Podium and maybe use Photoshop to clean the images up a little more.
I do have one question though, you have in one of the screenshots that the hardware edge smoothing is "low". I did two image grabs of it on low and two of it on high, I think high took out the jaggedness of some of the edges.
Then here are the two with the hardware edge smoothing set to high.